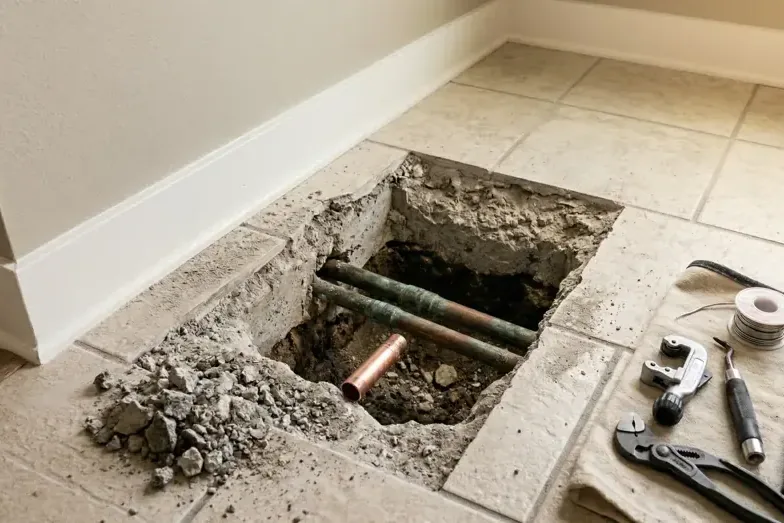
Water emerging at a floor seam may have traveled beneath the finish before becoming visible. A plumber identifies and corrects the concealed pipe problem, while restoration technicians determine which flooring, wall bases and cabinet edges received water. Across Parrish, the first inspection follows damp edges into adjoining rooms so repair planning includes concealed moisture beneath the floor.
Key takeaways
- Treat a warm or damp floor as a clue rather than proof.
- Use a plumber for pipe detection and repair.
- Map finish moisture across doorways and cabinet edges.
- Extract accessible water before controlled drying.
- Base floor opening and repair decisions on direct evidence.
Recognize symptoms without diagnosing from appearance
A warm tile, damp grout joint, changed floor color or unexplained supply use can suggest concealed water. The visible symptom may sit away from the defect because water follows the easiest space below the finish.
Occupants should move reachable dry belongings and avoid wet electrical areas. They should not break tile or drill into a slab. Photographs preserve the first floor symptom before plumbing access or slab leak restoration changes the area.
- Record every room with a floor symptom.
- Keep furniture movement within dry access.
- Do not create exploratory openings.
- Note when the condition first appeared.
Keep plumbing detection and restoration separate
The plumber uses appropriate methods to locate and correct the pipe failure. Restoration staff test the building materials affected by that release. The scopes overlap in location but answer different questions: where the pipe failed and where water traveled.
A clear incident record names the plumbing finding, access point and correction, then maps flooring and wall materials around it. That division prevents a repaired pipe from being mistaken for a dry floor system.
- Document the confirmed pipe location.
- Record every plumbing access opening.
- Map the material boundary independently.
- Keep repair and drying invoices distinct.
Follow moisture through floor transitions
Water beneath continuous tile or underlayment can cross a doorway without forming a second puddle. Technicians test on a grid that extends from the source area into neighboring rooms.
Cabinet toes and wall bases receive their own readings because they absorb differently from flooring.
In Parrish homes near U.S. 301 and State Road 62, technicians check floor seams, wall bases and cabinet edges around the first damp spot. Readings taken through adjoining rooms show how far water has traveled.
Marking those locations gives the crew a clear map for extraction and later drying checks.
- Test both sides of each threshold.
- Compare flooring types separately.
- Check wall bases at the floor perimeter.
- Mark a suitable dry reference area.
Choose access from the evidence
A controlled opening may be needed to reach trapped water, but broad removal is not automatic. Stable finishes can remain when condition, water category and progress readings support drying.
Swollen composite material or an enclosed layer that does not improve requires another decision.
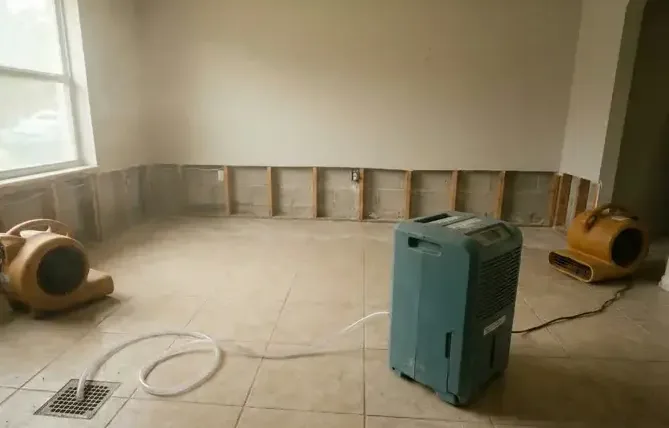
The water extraction service removes recoverable water at accessible edges. Airflow then targets exposed damp surfaces, and dehumidification collects vapor. Equipment placement follows the mapped floor field rather than the plumbing opening alone.
- Use detail tools at accessible seams.
- Open only where findings support access.
- Record material condition before removal.
- Protect unaffected rooms from work debris.
Read progress across more than one layer
A dry tile face cannot establish that underlayment or a wall sill is dry. Technicians return to the same marked points and compare trends. When the center improves but one cabinet edge stalls, access or air delivery can change there.
The crew records where the supply water escaped, how long materials stayed wet and what the water touched. Those details determine cleaning and decisions about retaining flooring.
The drying time estimator explains how saturation and access affect the schedule; repeat readings show when the affected layers are ready for repair.
Prepare a floor record for reconstruction
Closeout documentation includes the confirmed pipe correction, initial meter grid, access openings, extraction, equipment changes and final comparisons. It identifies flooring or cabinets removed and the exact area prepared for repair.
The record should also state what was not affected. Dry reference points and stable adjoining rooms keep the repair scope from expanding beyond observed evidence. That clarity matters when a continuous floor extends through several spaces.
- Attach the meter grid to room photographs.
- List each threshold tested.
- Identify retained and removed materials.
- Confirm ending values at the boundary.
Watch the repaired floor without relying on surface appearance
After the pipe correction, moisture already beneath the finish may continue moving toward an edge. The mapped grid gives technicians a way to distinguish expected drying from a new symptom.
Measurements at the plumbing access, wet center, doorway and dry boundary should remain tied to their original labels.
Floor coverings and heavy furnishings can limit evaporation or block test locations. Their original placement belongs in the photographs, and their return should wait until the affected field reaches its documented endpoint.
This keeps a visually restored room from hiding an incomplete material condition.
Cabinet bases need separate checks. Technicians measure the slab, inspect swollen toe panels and check accessible flooring beneath the cabinet. Each layer has its own drying target. A damaged panel can need replacement even after the surrounding floor has dried.
When finish repair begins, the contractor should know the precise plumbing opening and the areas restoration work exposed. That information limits unnecessary disturbance and helps new material meet stable retained construction.
The incident diagram also preserves which adjoining rooms tested dry and remained outside the scope.
If dampness returns after repair, the owner should note its location and when it appeared. The earlier moisture map helps the next contractor compare that spot with the repaired pipe and previous access openings.
Fresh plumbing checks and floor readings then determine the next steps. Keeping photographs, repair invoices and drying logs together makes those comparisons easier and helps identify which finishes need inspection.
- Keep grid labels visible through the drying period.
- Delay rugs and heavy furnishings until verification.
- Compare cabinets and floors as separate materials.
- Give the repair contractor the final room diagram.